
How to replace vr face pad is usually a quick job, but if you rush it you can end up with light leaks, fogging, or a pad that peels off mid-session. The good news, most headsets use a snap-in frame or magnetic interface, so you do not need special tools.
If you play fitness titles, share a headset with family, or notice itchiness and odor, the face pad becomes a real bottleneck. Comfort drops, hygiene gets harder, and even tracking can feel “off” when the headset sits differently on your face.
This guide focuses on the practical stuff people actually trip over, how to identify your mounting style, how to avoid tearing clips, and how to set the new pad so it seals without pressure points. I will also call out when it makes sense to buy a different thickness or material instead of forcing the default fit.
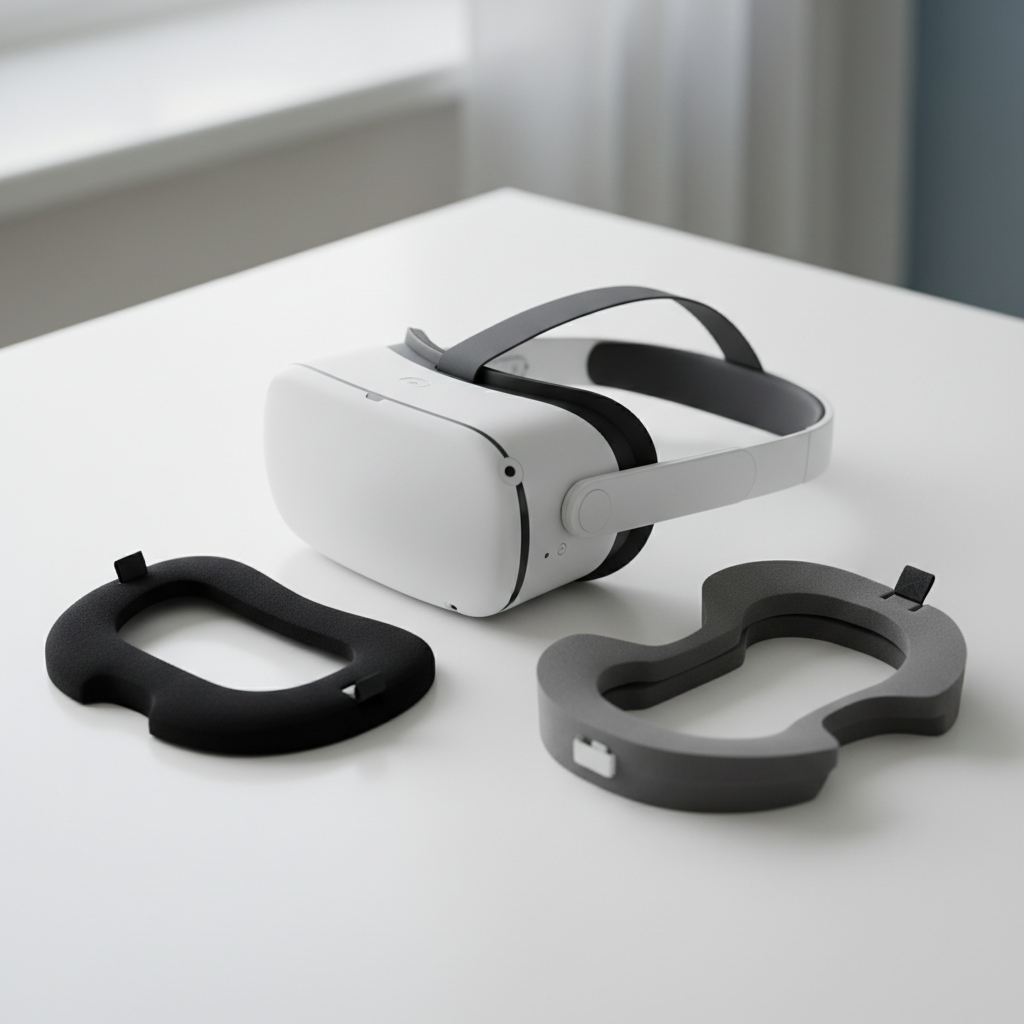
Before you start: identify the headset interface style
The fastest way to avoid damage is to confirm how your face pad attaches. Many modern VR headsets use one of these setups, and the removal technique changes slightly.
- Magnetic interface: the pad or the plastic facial interface “floats” on magnets and lifts away with gentle force.
- Snap-in frame: a rigid plastic frame clicks into the headset with tabs or clips.
- Hook-and-loop only: the foam pad attaches directly to an interface using Velcro-style strips.
- Hybrid: magnets for the frame, hook-and-loop for the foam surface.
If you are unsure, check your headset manual or the manufacturer support page. According to Meta, user manuals and official support guides are the safest source for maintenance steps and compatibility notes.
Tools and prep that make the swap easier
You can replace a face pad with bare hands, but a little prep prevents grime transfer and keeps adhesives from failing.
- Microfiber cloth to wipe the plastic interface and lens area perimeter, avoid paper towels near lenses.
- 70% isopropyl alcohol (optional) for cleaning plastic surfaces, keep it away from lenses and porous foam.
- Clean, dry hands or nitrile gloves if you are sensitive to cleaners.
- A well-lit table so you can see tabs and alignment notches.
Power the headset off and remove any facial accessories that can snag, like lens rings, clip-on light blockers, or third-party straps that press into the interface.
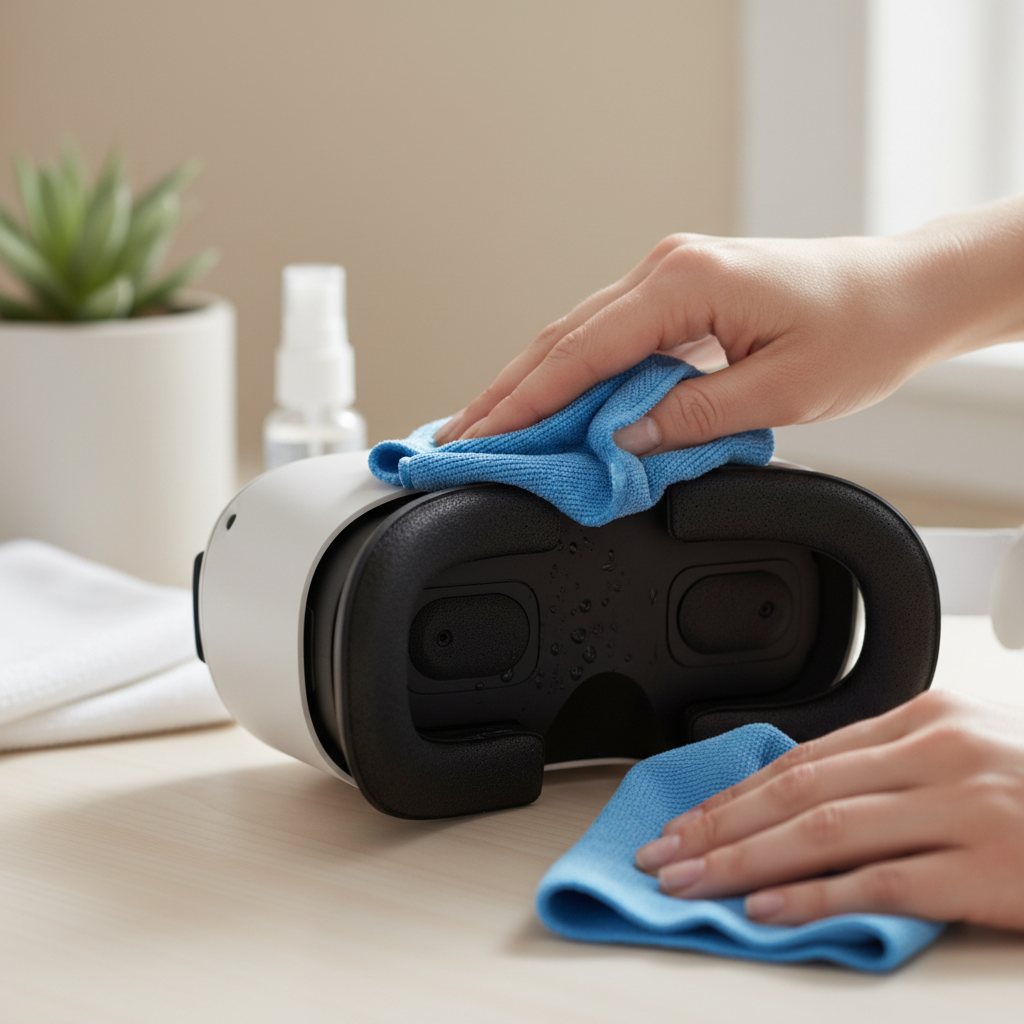
One more small thing, if your current pad is damp from sweat, let it air out for a few minutes before removal. Wet foam can tear more easily and leaves residue.
Step-by-step: how to replace VR face pad (most common methods)
Method A: magnetic face interface
With magnets, the goal is steady, even lifting, not yanking from one corner.
- Hold the headset with one hand on the shell, not on the lenses.
- Use your other hand to lift the interface from the nose area or lower edge where you can get purchase.
- If it resists, change grip and lift evenly from two points, magnets often release together.
- Set the interface down and separate the foam pad if it uses hook-and-loop.
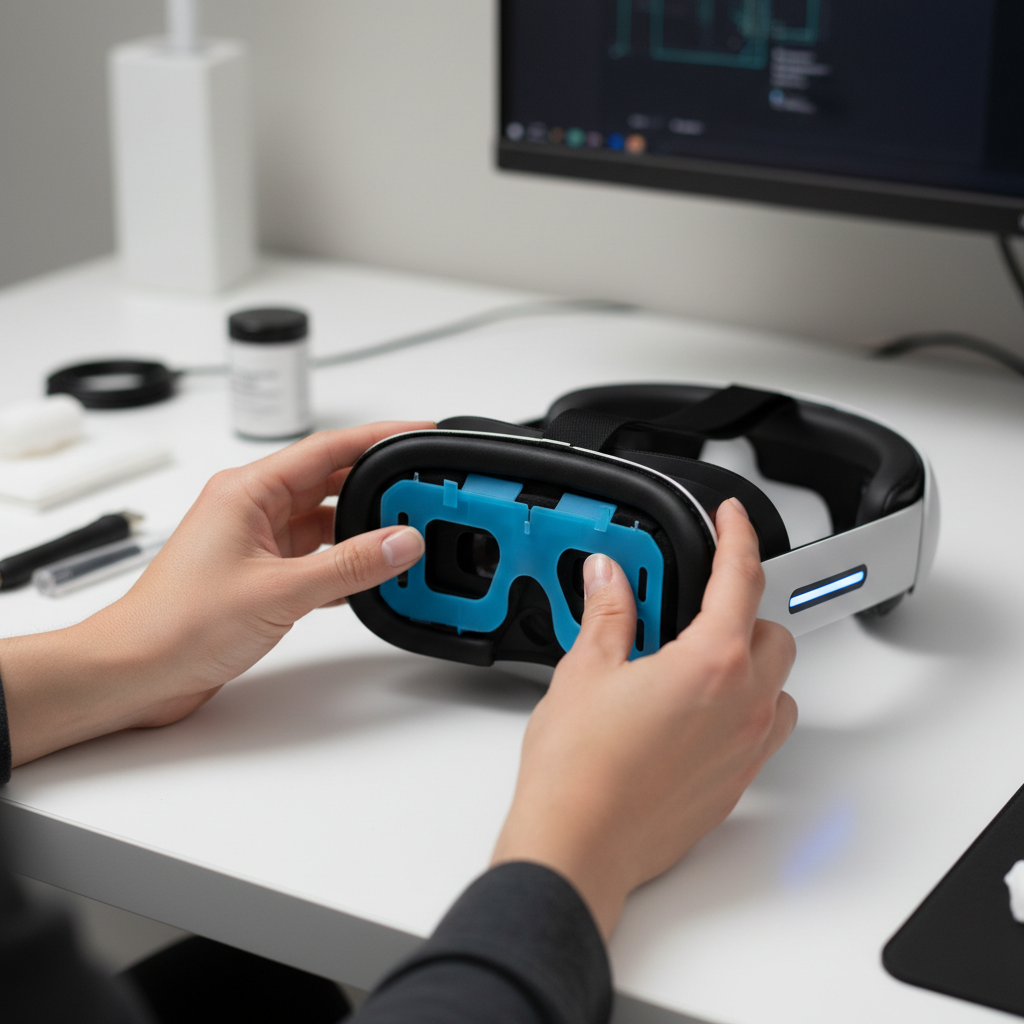
Method B: snap-in facial interface with clips
Clips break when you lever too hard in a single spot. Work around the perimeter.
- Find a seam where the interface meets the headset frame.
- Pull outward gently until the first tab releases, you should hear a soft click.
- Continue along the edge, releasing tabs one by one rather than forcing the whole frame.
- Avoid pushing fingers into the lens area, pressure can smudge or scratch.
Method C: hook-and-loop foam pad only
If the foam is the only removable layer, peel slowly, keeping the pull angle low to reduce stress.
- Start at an edge and peel back an inch or two.
- Continue slowly around, support the plastic interface underneath.
- Remove leftover lint from the hook-and-loop strip so the new pad grips evenly.
When you install the new pad, line up the nose cutout first, then press around the perimeter with light, even pressure. For hook-and-loop, press and hold each section for a second so the fibers seat.
Fit and comfort check: stop light leaks without overtightening
After you replace the pad, the headset may sit differently, especially if the new foam is thicker, thinner, or a different material like silicone. Do a quick fit check before you start playing.
- Light leak test: in a bright room, put on the headset and look for strong side glow, small nose gaps are common and not always a problem.
- Pressure points: if your cheekbones or forehead feel “hot” within 2–3 minutes, adjust strap angle before blaming the pad.
- Lens-to-eye distance: if your eyelashes brush the lenses or your FOV feels narrower, your pad thickness may not match your face shape.
- Fogging: more seal can mean more heat, consider a breathable fabric pad for longer sessions.
If you share the headset, keep in mind each person may prefer a different thickness. Many households keep two pads and swap them rather than trying to make one pad work for everyone.
Choosing the right replacement pad: material and thickness trade-offs
Not all replacement pads are about comfort, some are about cleaning speed, sweat control, or glasses clearance. Here is a practical comparison you can use while shopping.
| Option | Feels like | Best for | Watch-outs |
|---|---|---|---|
| PU leather (pleather) | Smooth, sealed | Easy wipe-down, fitness play | Can get warm, may trap moisture |
| Fabric | Soft, breathable | Long sessions, less sweat pooling | Harder to deep-clean, can hold odor |
| Silicone cover (over foam) | Rubbery, tight seal | Shared headsets, quick sanitizing | Can increase fogging, comfort varies |
| Thin foam | Closer to lenses | Wider FOV feel, smaller faces | Less cushion, more pressure risk |
| Thick foam | More cushion | Comfort, glasses clearance | Narrower FOV, more light leak if misaligned |
For most people, the “right” choice depends on your main use. Fitness players often prioritize wipeable surfaces, while sim and story players tend to value breathability and pressure distribution.
Common mistakes that cause slipping, skin irritation, or damage
When people say they tried how to replace vr face pad and it “did not work,” it is often one of these issues.
- Installing off-center: even a small shift can create a bright leak on one side and make you overtighten straps.
- Mixing incompatible parts: some pads require a matching interface frame, forcing it can bend tabs.
- Cleaning the wrong way: harsh cleaners on foam can degrade it, and liquids near lenses can leave residue.
- Overtightening straps to compensate: this can cause headaches or facial numbness, adjust top strap angle instead.
- Ignoring sweat management: if you play intense games, keep a second pad so one can dry fully between sessions.
On hygiene, be conservative. According to CDC, cleaning and disinfecting guidance varies by surface type and product label directions, so follow your headset manufacturer advice and the cleaner instructions rather than improvising.
If you notice persistent redness, itching, or burning after switching materials, stop using that pad and consider a different surface. Skin sensitivity varies, and if symptoms continue, it may be smart to ask a healthcare professional.
Quick troubleshooting: when the new pad still feels wrong
You replaced the pad, but something still feels off. Try these targeted fixes before buying another accessory.
- Pad keeps falling off: check hook-and-loop orientation, remove lint, and press around edges again, if clips are involved, confirm each tab fully clicked.
- More light leak than before: reseat starting at the nose bridge, then work outward, also check whether your strap angle pulls the headset upward.
- Headset feels heavier: your new pad might shift weight forward, reduce face pressure by tightening the top strap slightly and loosening side straps a touch.
- Fogging increased: reduce seal with a more breathable pad or take short breaks to cool, some people also benefit from a small fan in the room.
- Glasses pinch: thicker pads can help, but you may need a glasses spacer or prescription lens inserts depending on headset model.
Compatibility is a real constraint, so if a pad “almost fits,” do not force it. In many cases the correct fix is the correct interface frame, not stronger pressure.
Key takeaways and a simple routine to keep pads usable longer
Once you learn the attachment style, how to replace vr face pad becomes a 2–5 minute habit, and it pays off in comfort and hygiene. The biggest wins come from alignment and choosing a material that matches how you play.
- Do: clean the interface lightly before install, align nose cutout first, and confirm tabs or magnets fully seat.
- Do: keep a second pad if you sweat a lot or share the headset.
- Avoid: harsh chemicals on foam, forcing incompatible frames, and overtightening straps to “fix” leaks.
If you want a low-effort next step, set a reminder to wipe the pad after intense sessions and let it dry fully before storing the headset, that one habit prevents most odor and peeling complaints.
FAQ
How often should I replace a VR face pad?
It depends on sweat, skin oils, and how many people use the headset. Many users replace when the foam stays compressed, starts peeling, or odor remains after normal cleaning.
Is it safe to use alcohol wipes on a VR face pad?
Some wipeable PU surfaces tolerate light alcohol use, while porous foam often does not. Check the headset maker guidance and the pad material notes, and keep liquids away from lenses and speakers.
Why does my headset feel tighter after I install a new pad?
New foam has more rebound and can push back against your face. Give it a few sessions to break in, and adjust strap angles so the top strap carries more weight.
How do I stop light leakage around the nose after replacing the pad?
Start by reseating the pad centered on the nose cutout, then adjust strap tension so the headset rests evenly. If the pad is thicker or thinner than stock, a different thickness may seal better for your face shape.
My replacement pad does not stick well to the Velcro, what should I do?
Clean lint off both sides, then press firmly around the perimeter in sections. If the hook-and-loop strip is worn, you may need a replacement strip or a new interface piece rather than another pad.
Can a new face pad change my field of view?
Yes, thickness changes lens distance. Thinner pads can feel wider, thicker pads can feel narrower, comfort and glasses clearance may improve though, so it is a trade-off.
Do I need a different face pad for VR fitness?
Not required, but many people prefer a wipeable surface or a silicone cover for faster cleanup. If you get fogging, consider balancing hygiene with breathability rather than maximizing seal.
If you want a simpler upgrade path
If you are swapping pads because of sweat, comfort, or sharing concerns, it can help to pick a replacement set that includes both the pad and the matching interface for your headset model, that usually reduces fit surprises and makes the whole process feel more “snap in and go.”